Equipment
The TrikeBuggy and other PPG Trikes
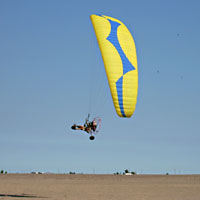
A PPG Trike is simply a powered paraglider backpack motor unit mounted to a three or four wheeled foot steerable trike, using a standard paraglider wing to achieve flight. The TrikeBuggy is around 130 pounds including the motor and trike. Motor size is anywhere from 100cc to 325cc, and the backpack motor is removable for foot-launched flight as well (with the same wing). The TrikeBuggy allows a pilot to launch and land without having to carry the paramotor on their back. They simply roll into flight!
 The Paraglider The Paraglider
There are a number of proven paraglider designers/manufacturers in the world, each striving to combine in their gliders the highest levels of safety and performance. Their paragliders are certified in Germany and issued DHV ratings. These numbers indicate the level of pilot input that will be required to recover from collapses and stalls.
Unforunately, there are more and more individuals driven only by profit who are copying gliders and offering them for sale for less. A change in material or lines can completely change the way a glider reacts, compromising it's safety. Without a new DHV test, these gliders are not to be trusted with your life. Many of these do not even offer a recommended weight range! A certified glider will have a placard attached that includes the manufacturer, model, date of manufacture, DHV rating and the tested weight range. Look for a placard on your new wing!
A beginner wing (DHV 1) will offer the highest level of safety but will likely have a lower glide ratio and overall performance. An advanced wing (DHV 2/3 or 3) will require a great deal of pilot input to recover from collapses and stalls but will generally be faster, have a better glide ratio, and maneuver more quickly.
It is of the utmost importance to fly a wing that is within your skill range. Therefore, during your first few lessons, you will fly a DHV 1 glider and when you are ready to move ahead, your instructor will have you demo a number of gliders from reputable dealers and help you choose the glider that is best for you. No matter what brand of paraglider you are flying, there are certain aspects that will remain the same. A familiarity with this equipment and terminology will be helpful for your first day of lessons.
- The Canopy is made of 2 layers of synthetic materials, designed to be lightweight yet maintain a low porosity for the life of the glider.
- The Upper Surface of the glider is the top surface during flight.
- The Under Surface of the glider is the attachment surface for the lines.
- The front of the wing is called the Leading Edge.
- The leading edge is made up of openings called Cells. Gliders have varying numbers of cells based on size and performance.
- Between the cells are Crossports - holes in the intercell walls that allow air to pressurize across the wing when inflating and during flight.
- The rear of the wing is called the Trailing Edge. This edge is sewn closed.
- Descending from the canopy, towards the harness are the Lines.
- The lines are attached to Risers, depending on their orientation on the wing.
a. A Risers (the most forward set of risers) may be a single riser or split risers. They are connected to the lines that attach to the leading edge of the glider. The A risers and lines are used to accelerate the glider while kiting.
b. B Risers (the middle set of risers) offer stability and form to the wing. They are also used in advanced maneuvers.
c. Rear Risers gather the lines that are connected to the trailing half of the glider. They normally are the attachment point for the brake line and toggle as well. The Rear risers and lines are used to decelerate the glider when kiting.
- Toggles (often referred to as the brakes) when detached from the rear risers can be used to turn the glider as well as to decelerate the glider. The brake toggles are attached to the trailing edge of the wing. They are the primary means of directional control. When running forward or in flight gently pulling the left or right brake will turn the glider in that direction.
The TrikeBuggy
The TrikeBuggy is a simple three wheeled cart with attachments to secure your paramotor behind you. You simply lay out the glider, preflight the trike and motor, attach the risers, sit down, buckle up and go flying! It is a great way to enjoy flight when the wind is calm, or if you have challenges carrying or running with the motor unit on your back.
The TrikeBuggy is unique because of its low Center of Gravity, its super strong construction and how easy it is to use! Many PPG Trikes get the job done, but this one is a pure joy to fly! No more "High Chair" precariously balanced taxi runs, wondering what it feels like to topple over! The TrikeBuggy actually protects you with a bullet-like case all around you.
How does it work?
- The Trike Steering on the ground is done by your feet, which pivot the front wheel(s) by pushing gently.
- The Wheels are made for all-terrain: lumpy dirt, sand, low grass, etc.
- The Motor Attachments must be secured to the motor and checked before each flight.
- The Paraglider is attached to the TrikeBuggy, and the pilot is seated and fastened into the Buggy with a seat belt.
- The pilot attaches the paraglider risers to Caribiners on each side of the TrikeBuggy Power Loops. The lines are held by Line Guides that keep the lines
at the 3 and 9 o'clock positions on the motor cage to assist with the inflation.
- The Paramotor will provide the power to push the TrikeBuggy and pilot forward to inflate the glider and power it into flight.
- In case of a Motor-Out, you simply glide down to a landing with your paraglider.
Your Powered Paragliding equipment is your key to the sky! Keep it in good running order so you can enjoy flying without disruptions. Each PPG pilot is his or her own mechanic - there are few garages that work on these specialized motors!
Don't show up at the agreed launch area without being sure your motor works and your wing is in flyable condition! Use the time between flying to tune and tweak your gear. The last thing you want to do is to have to fix your motor while the others are going on a nice little cross-country flight. I doubt they will stand around and watch while you repair your engine during prime flying time! Be ready before you arrive.
|