![]()
![]()
Assembly Instructions
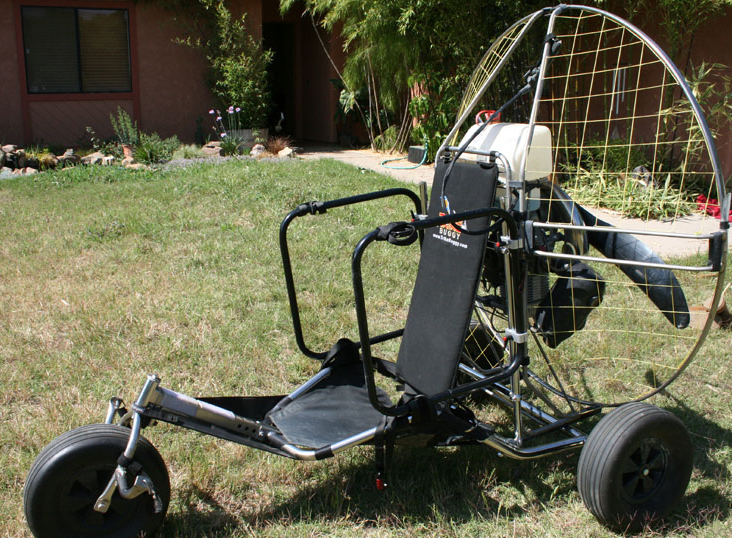
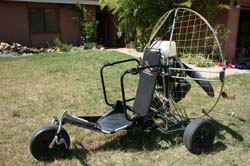
Congratulations and Thank You for your purchase of the TrikeBuggy Classic v3.0!
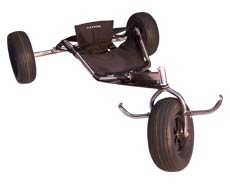
Assemble the Flexifoil Kitebuggy according to the instructions supplied. Pay careful attention to the seat strap detail and be sure to use the copper bolt lubricant supplied, or the bolts will seize! The included sand shield is helpful if launching from sandy beaches. Keep the tire pressure low if you are going to be launching from soft sand, or simply want a softer ride.
Check your Parts List to make sure you have received all the necessary parts for the assembly. All of the pictures on this page can be clicked to enlarge so you can see more clearly the detail.
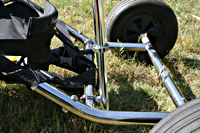
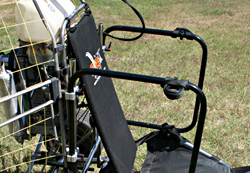
Assemble the Rear Uprights and Motor Mount horizontal bars as shown in the photo. The Motor Mounts will be adjusted to the height that best suits your paramotor.
Position the clamp of the Rear Uprights on the frame of the buggy just behind the seat as shown in the photos (click for more enlarged photos). Lean the Motor Mount assembly forward, so that the motor thrust will angle slightly upwards when sitting on the ground.
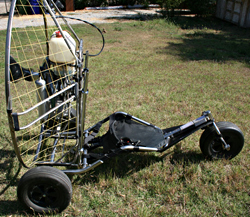
Set the Motor on the rear axle and lean it against the Rear Upright. Move the horizontal Motor Mount so that it is positioned just in front of the Comfort Bar receptacles on your paramotor. Slide the Comfort Bar Adapters into your motor and attach them to the Motor Mounts (see photos).
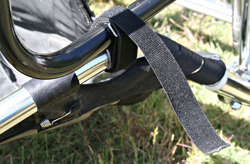
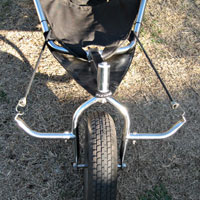
Attach the Seat Belt to the side bars of the Buggy frame just behind the seat rest.
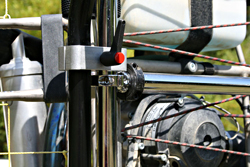
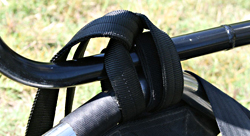
Position the Riser Guide about 13" forward of the Motor Frame on the top flat side of the Power Loops for the TrikeBuggy Classic. Tighten them gently, as you will likely be making adjustments to the hanging position with these clamps. Add the 9" Hang Straps as redundant riser guides as shown.
To balance the trike for flying, hang the trike 6-8 inches above the ground from a secure source (tree, beam, flight simulator) by the caribiners and sit in the seat. Have someone look at the balance from the side of the trike. The front wheel should be 6-12 inches higher than the rear wheels when suspended with the pilot in the seat and gas in the tank.
Check all bolts, nuts and clamps before each flight, just as you would do on your motor - Preflight!
If there are any questions or concerns, please feel free to call me anytime (805-403-1859), or email me at chad@TrikeBuggy.com. If I'm not flying at the moment, I will gladly assist you.
Enjoy your new TrikeBuggy!
|

|
|---|
|
DISCLAIMER: Please read and be sure you thoroughly understand this disclaimer before flying a TrikeBuggy. Trike flying is an extremely demanding sport requiring exceptional levels of attention, judgment, maturity and self discipline. It is unlikely that you will be able to participate in it safely unless you make a conscious and continual commitment to your own safety. PPG and Hang Glider Trike flying is a dangerous sport and may result in injury and death even when practiced by a competent pilot using proper equipment. TrikeBuggies are not covered by product liability insurance, nor have they been designed, manufactured or tested to any federal or state government airworthiness standards or regulations. Do not fly them unless you are willing to assume personally all risks in the sport of Trike flying, and all responsibility for any property damage, injury, or death which may result from your use of this TrikeBuggy. Safe operation of the TrikeBuggy requires a pilot proficiency equivalent to that of a BFI (Basic Flight Instructor), as well as an equivalent level of knowledge and understanding of those wind and weather conditions which may compromise the pilot's safe control of the TrikeBuggy. In particular, be advised that gusty winds or turbulent conditions may interfere with even an expert pilot's ability to safely control the TrikeBuggy, and may cause it to crash. Never take anything for granted in Trike Flying. If you are in doubt about anything, stop and figure it out or contact TrikeBuggy. Also please read our Warning and Caution! |
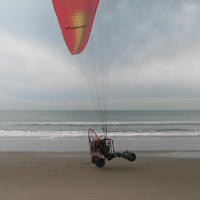
 This is also the only PPG Trike on the market you can transform back into a kitebuggy in just a matter of minutes - giving you the ability to do either activity. When the wind comes up, you'll be ready!
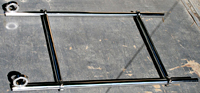
 PPG Triking requires specific skills which are different than foot launched flight. If you have not flown a PPG Trike before, an experienced PPG Trike instructor will save you time and money by helping you understand the necessary fundamentals of inflation, taxiing and launching. Landing will be one of the most pleasurable experiences you will ever enjoy, as long as you have good throttle and surge control.